Palo Alto for GNS3 CCDC Tutorial
Opening
Hello fellow CCDC Competitors! Struggling to get a Palo-Alto VM? I know how you can get one! Email me at ASzampiasSWD@gmail.com. I'll tell you the steps to get a PA-VM for GNS3.
Why am I giving this info to you? Wouldn't it make sense to hog the info to myself? Wouldn't my team have an advantage?
There are have and have not universities when it comes to PaloAltos. I fell into the "have not" group. Our college didn't have access to PA-VMs and still doesn't. Even if PA Cybersecurity Academy is free, there is too much red tape. I can't change the outcome. I can only come up with this one solution.
Another reason is Tri-C is a tryout team. I think its pretty unfair as a potential Firewall Admin I'm the only one with access. No one can challenge me unless they spend 2K for a PA-VM. It becomes a rich-person only position. I have a leftover PA-VM from 2018 I promised not to share. I couldn't share that with my challengers. But I found a GNS3 version I can share.
Notes
- This PA-VM is SLOW as can be. It feels like a really bad day with Salesforce. The GUI is so slow its unusable. On a good note the CLI is fast. The GUI is fast enough you can check if your CLI config is correct. Your just gonna have to learn in the desert with CLI only. This disadvantage will make us Firewall Admins very quick though! Will be training in the desert vs GUI-only admins. If something goes wrong (which trust me that GUI will disappear) we can recover and continue on CLI. Or even be 100% CLI Admins.
- No license. No fancy security features. Head over here NETLAB to practice that portion. It's $50 for 6-months of access. The downside is the topology is unmovable. You can't test out scenarios. We can use GNS3 for this.
Tutorial
Before you do these steps I suggest you get acquainted with GNS3 first. Import a Cisco C7200 and a Cisco Switch. Make a small topology.
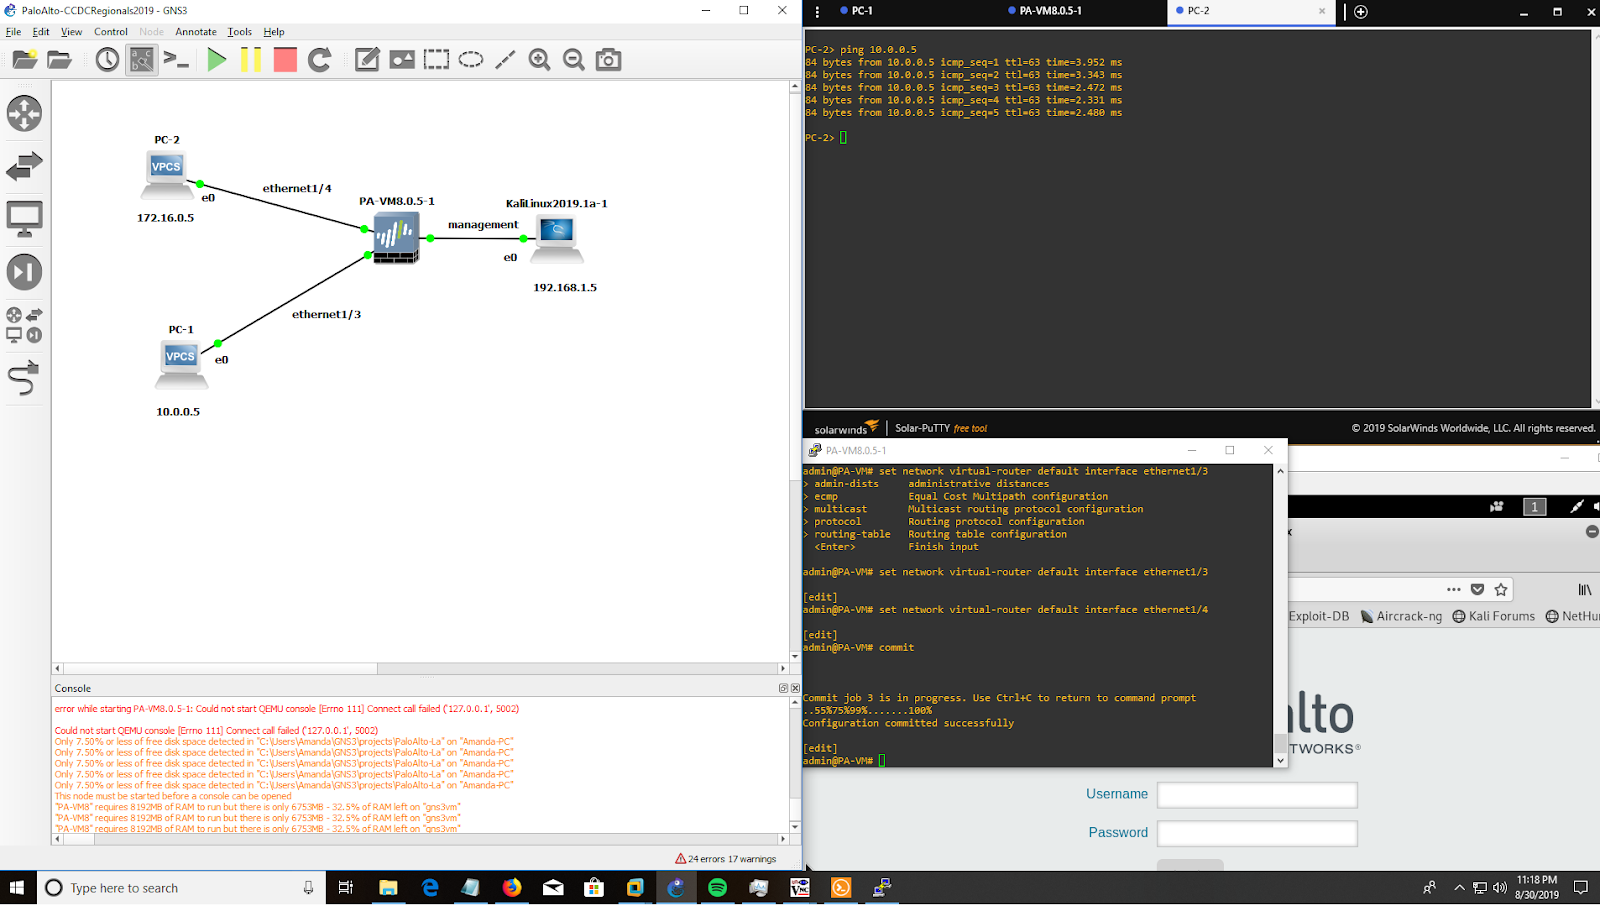
I'm using the topology up above as the example.
Step 1: Configure Settings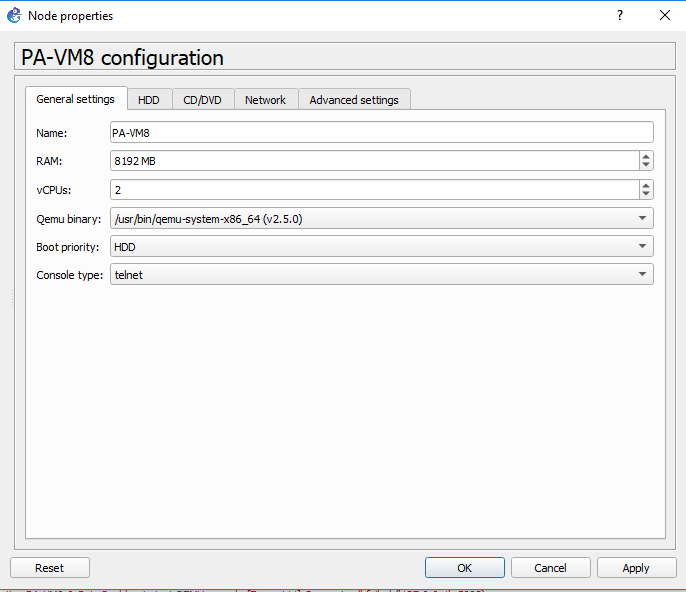
Unsure why this is. You either do it 1 or 20 times. Just keep at it until you get in.
Step 3: Assign Management IP AddressThis VM doesn't come with the standard "192.168.1.1" default. We have to set it ourselves.
configure
set deviceconfig system type static
set deviceconfig system ip-address 192.168.1.1 netmask 255.255.255.0
commit
Step 4: Create a Zone The ethernet interface won't pass traffic until we assign a zone. We must create a zone first.
set zone insideStep 5: Set up the ethernet1/3 Interface
set network interface ethernet ethernet1/3 layer3 ip 10.0.0.1/24
set zone inside network layer3 ethernet1/3 (this option won't appear until we do the above)
Step 6: Set up the ethernet1/4 Interface
set network interface ethernet ethernet1/4 layer3 ip 172.16.0.1/24
set zone inside network layer3 ethernet1/4
commit
Step 7: Add these ethernet interfaces to the default virtual-router
set network virtual-router default interface ethernet1/3
set network virtual-router default interface ethernet1/4
commit
Step 8: Create an ALL Security Policy
set rulebase security rules ALL to any from any source any destination any service any application any action allow
commit
We don't need this since same zone-to-zone traffic is allowed by default. I'll show you how to make a security rule anyway.
Step 9: Ping PC-1 to PC-2You should get a ping back.


Comments
Post a Comment